
Hello, World!
This week I was able to flesh out the primary steps a lot more. I found myself concentrating a lot on the overall organization of the page, and looked through GitHub to see if other repositories had “contributing.md” files from which I could draw inspiration. From the examples I found, I noted that headers were very useful for dividing up a longer “contributing.md” page into shorter, easy-to-follow sections. Some of these projects even had a table of contents at the beginning of their contributing page; however, we felt that a TOC would likely not be necessary for Project 1.
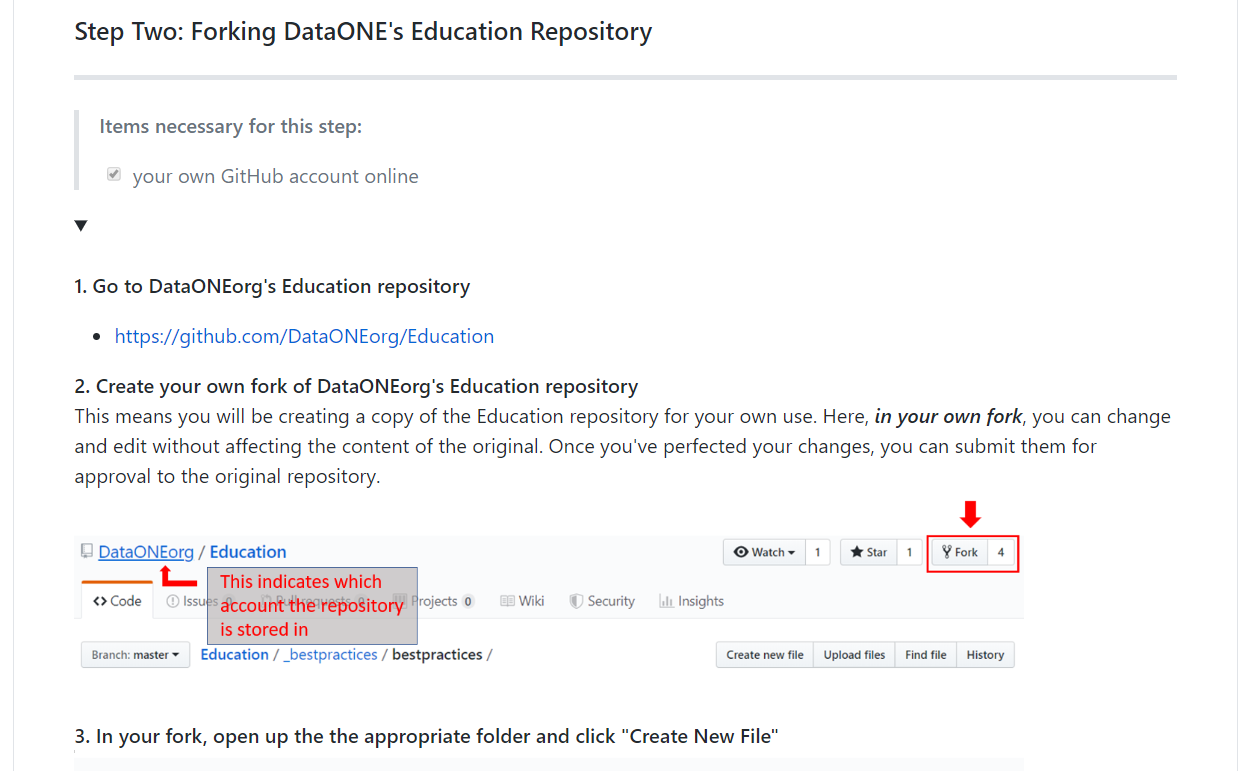
Some things that I was able to figure and add to the tutorial this week were: text links, images, code blocks, anchor links, and collapsible sections. One issue I had was formatting the text next to the dropdown arrow. Ideally, I wanted to have the dropdown arrow next to each section header, but I can’t figure out how to format the text at all when it’s next to a dropdown arrow.
The GitHub version of my tutorial:
Another interesting task I tried for this week was serving the tutorial I made through Jekyll. Jekyll is the engine behind GitHub pages. Basically, it allows users to create websites based on their GitHub repositories for free. I’ll admit that installing Jekyll was laborious for me as a PC user, but with the help of my mentor Dave Vieglais, we got it done!
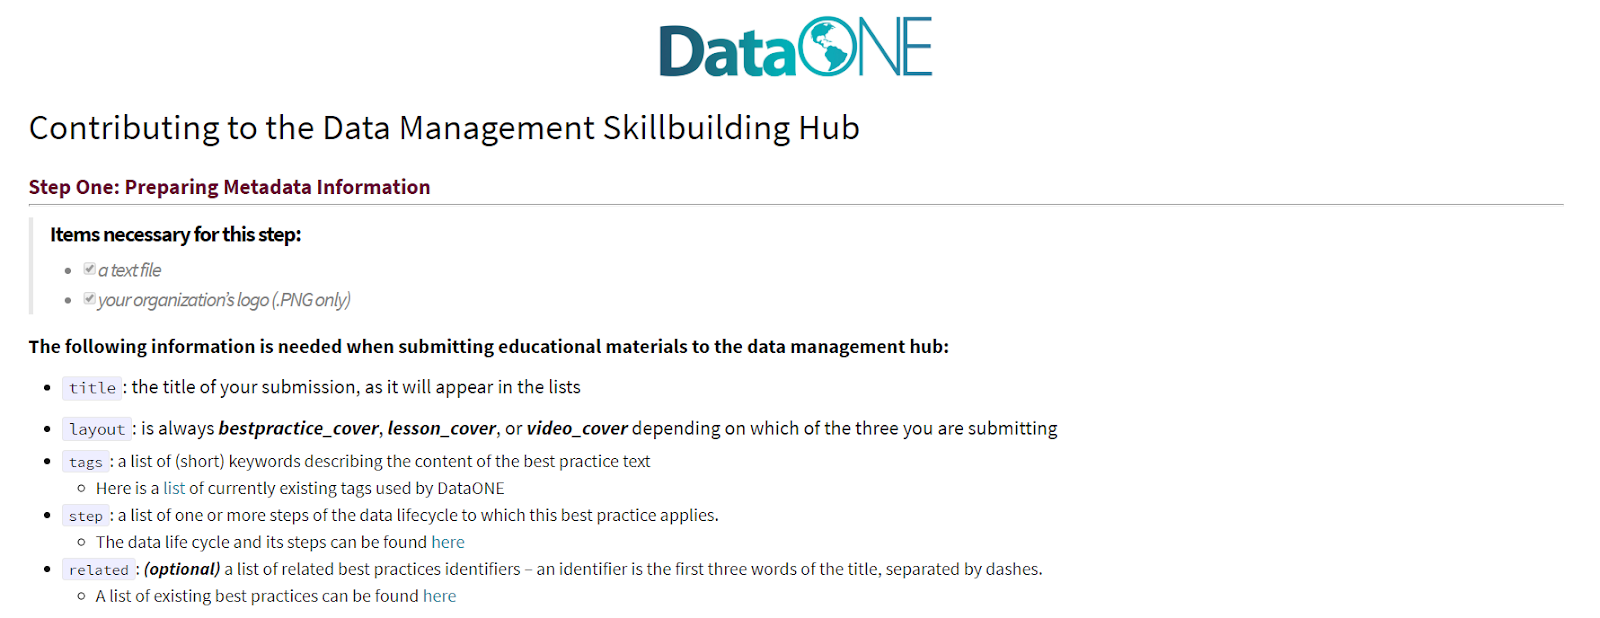
Using Jekyll, I can see for myself how my tutorial will look displayed on the web page without actually submitting it to the web page. This allows me to make changes easily.
The webpage version of my tutorial:
Next week I’ll be going into the secondary steps, where I’m going to explain the submission process based on content type. As of right now there are three categories: best practice, lesson, and video. I’ll explain the difference between these types in my next blog post.
Thanks!